Creating a purchase invoice
Who this page is for
Everyone who enters an invoice that arrived from a vendor. The invoice generates its own entry — do not book a manual entry for it.
Steps
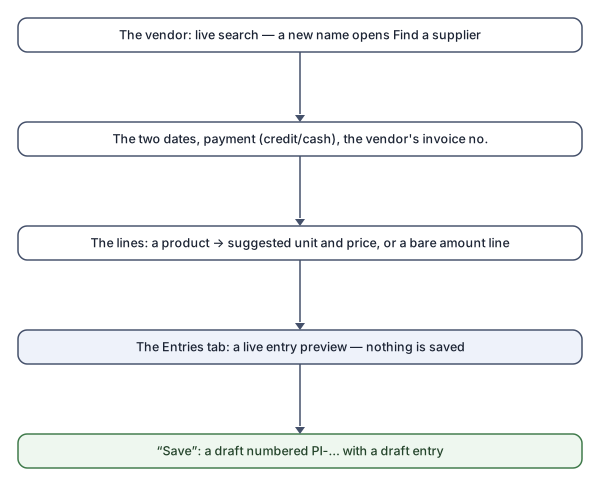
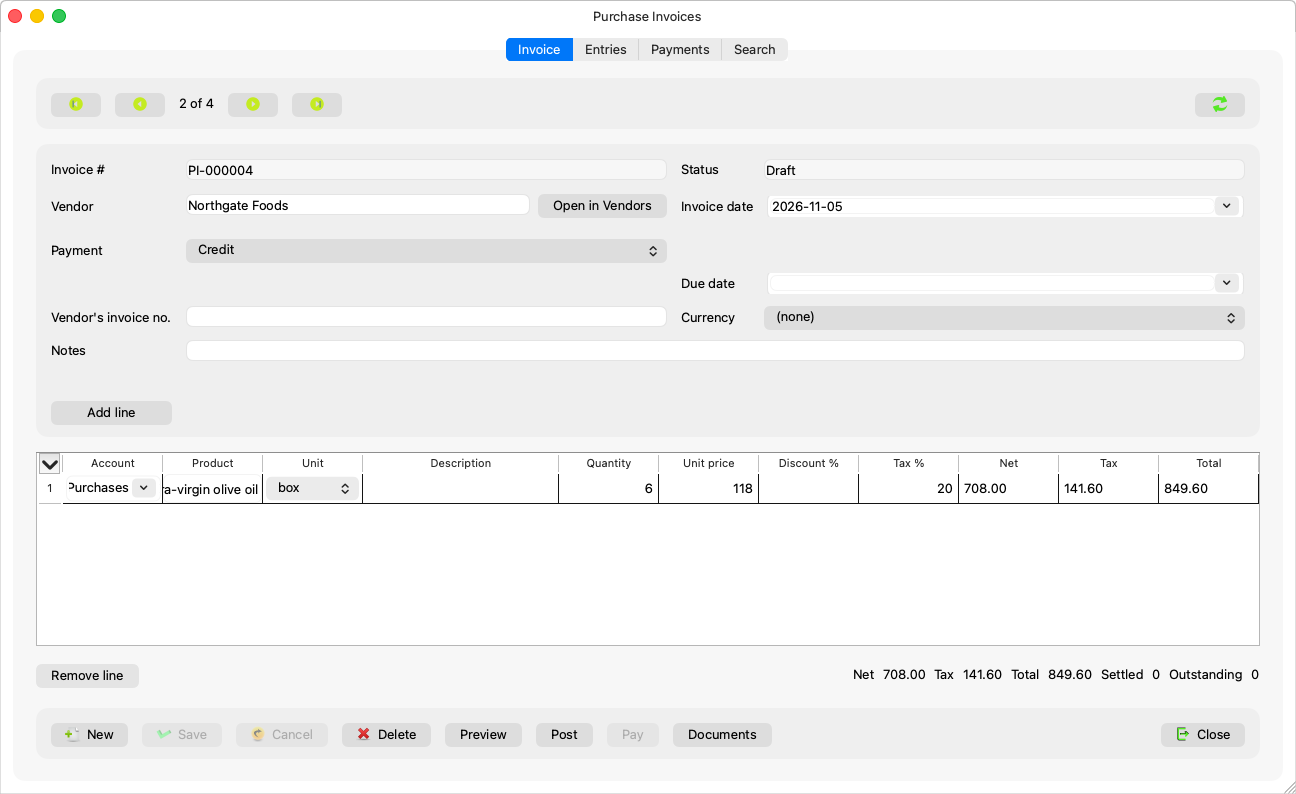
- Press New. The cursor lands in the vendor field, and the date starts on the date of the last save.
- The vendor: “Type to search the vendors” — the list suggests as you type. A name that matches nobody opens the vendor-finder dialog (below). “Open in Vendors” shows the chosen one in its own window.
- Complete the header: the two dates, the payment (credit/cash), the vendor's invoice number, the description.
- The lines — per row:
- Product: a live search like the vendor's; choosing one fills the suggested unit, price and account, and never touches what you typed.
- Unit: the chosen product's units.
- Quantity, Unit price, Discount % and Tax % — the grid computes Net, Tax and Total live.
- Account: starts on the default purchase account; when none is set, the account column always shows: “No default purchase account is set (Accounting Settings, Invoices tab), so each line chooses its account here.”
- A line without a product (a general expense): leave the product empty and type a description and an amount — “A line without a product needs an amount.”
- Add line opens a row and puts the cursor in its product; Remove line works by mouse only, so no key press ever deletes a row by accident.
- Watch the Entries tab: the live preview shows the entry that will be booked.
- Save (Ctrl+S): the invoice is saved as a draft with a draft entry. Posting is a separate step — Preview and post.
The vendor-finder dialog
It opens when you leave the vendor field holding a name nobody owns, and lists “Existing names closest to it — Enter selects one:”. Every name is marked: “supplier”, “customer” or “customer and supplier” — a person is one record however many roles they hold.
- The arrows move and Enter selects the highlighted name.
- Only Ctrl+Enter creates (“Ctrl+Enter creates a new supplier with this name.”) — creating a new person never happens by a stray Enter.
- Closing the dialog without a choice clears the field.
The payable account
The server picks the vendor's account under the vendors' account group. A vendor holding more than one shows the Payable account list: “Choose which of the vendor's payable accounts this invoice books against.” And a vendor with none: “This vendor has no payable account yet. Open it in Vendors and add a supplier account.”
Rules and refusals
| Sentence | What to do |
|---|---|
| “Choose the vendor.” | A credit invoice needs a vendor (a cash one does not — “Optional on a cash invoice”). |
| “An invoice needs at least one line.” / “The invoice total must be greater than zero.” | Complete the lines. |
| “Line {rows} is incomplete: an account, and a quantity and a price, or an amount.” | Incomplete lines are coloured, and the tooltip names them. |
| “A discount is between 0 and 100 %.” / “A tax rate is between 0 and 100 %.” | Correct the rate. |
| “A taxed invoice needs the Input VAT account (System Settings).” | A group administrator sets it once. |
| “The account group for vendors is not configured. A group administrator sets it in System Settings (Master Data → Accounting Settings).” | A one-time setting before the first vendor. |
| “Only the first {count} units can be chosen on a line: units added after them are not offered yet.” | A huge unit catalogue; the newest units are not offered here yet. |
The date and the period follow the same rules as entries (a closed fiscal year refuses, the Simple level asks about reopening) — see Creating an entry.
Common mistakes
- Creating a new vendor for every misspelling from the finder dialog — select the close existing name instead of creating its twin.
- Typing a line amount on a line that has a product: with a quantity and a price the amount is computed; “A line needs both a quantity and a price, or neither (then an amount).”